How to Remove a Chandelier Before Moving
You’ve organized your move to a new home and packed your belongings, but there’s one item left – the ceiling fixture. If you’re wondering how to remove a chandelier safely and without any damage, the great news it’s not as hard as it might look. Whether it is a modern, unique, or crystal one, with our handy tips, this job will require little effort and very little time.

Get the Right Tools and Packing Supplies
To carry this out properly, prepare packing materials for the move that will facilitate the process. Make sure to get the following:
- Several moving boxes,
- Protective paper,
- Bubble wrap,
- Foam padding,
- Packing peanuts,
- Duct tape,
- Cable ties,
- Plastic zip-lock bags,
- Old blankets,
- A set of screwdrivers,
- Pliers,
- Ladder.
A great idea is to have someone who can help you, especially if the chandelier is large and heavy. For example, you can hire professional moving and car shipping company to assist you with boxing up this fragile item.
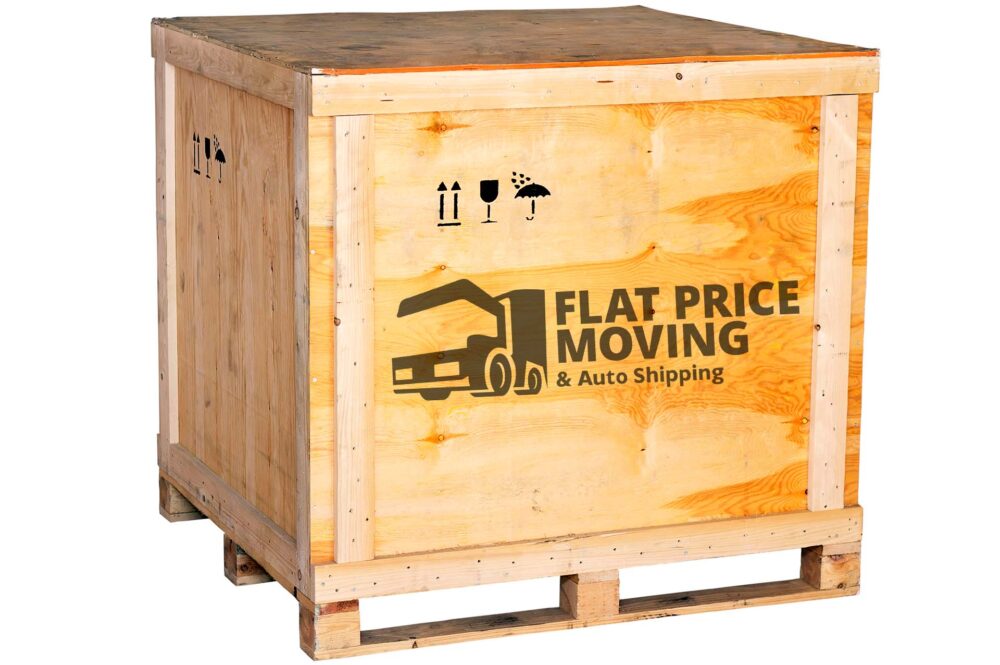
Pack and Protect Your Chandelier With a Custom Crate
Proper packing is crucial when moving a large, ornate chandelier to ensure it arrives at your new home in perfect condition. If your chandelier is massive and contains many delicate pieces, creating a custom wooden crate might be the best solution. This crate should be designed to allow the fixture to hang securely inside, with at least four inches of space on all sides for added protection.
To build this crate, you’ll need sturdy wooden pieces to create a secure hanging mechanism. Start by attaching two one-by-one wooden strips along the sides of the crate, ensuring they are two inches shorter than the height of the crate. Then, place a third piece of wood across the top, securing it with screws to create a ledge. This structure will allow your chandelier to hang safely during transport, minimizing the risk of damage.
To avoid all the hustle of creating your own wooden box, cause let’s face it, you’ll have so many other things to worry about, you should give Flat Price Auto Transport and Moving crew a call.
Our custom crating services have a purpose to protect your delicate, easily breakable or bulky items. All you have to do is give our long-distance movers measurements, and we will custom-build the wooden crate that will transport your fragile object.
How to Remove a Chandelier – Step by Step
Several things should be done before you start removing the object. These preparatory steps include the following:
- Turn off the circuit breaker providing electricity to the room. Make sure to check the wires using a voltage tester for safety.
- Turn off the electricity in the main power case.
- Put away all objects under the fixture and lay something soft on the floor, such as blankets or pillows, that will serve as protection in case any fragile or valuable piece falls off.
- Place an adequate step ladder under the chandelier.


How to Remove the Fixture from the Ceiling – Inch By Inch
To make this process as easy as possible, you should follow these steps. They will help you to be efficient and avoid unpredictable situations and mistakes.
- Take down the chandelier from the ceiling.
- Check your circuit breaker panel and disconnect the power to the lights.
- Remove the protective shield. It is usually a metal shield fixed to the ceiling. If it’s masked by a decorative ball, twist it and remove it.
- Take out the screws and consider using another person’s help to prevent anything from falling down.
- Use the voltage tester and check the power. It should be disconnected.
- Release the nut from the wires and separate them.

Moving Insurance
Flat Price Moving and Auto Transport Company offers moving insurance to cover potential damages
Read more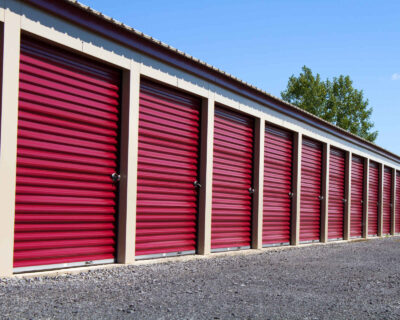
Storage Service
Knowing what kind of surprises cross country move may hold, we offer 30 day free storage for belongings at the origin state.
Read more
Packing Services
Our moving teams are trained to pack your belongings in the most efficient manner possible.
Read moreDon’t Forget the Grounding Wire in the Wall
Untwist the grounding wire if it’s twisted to the junction box. You can recognize it by green shielding material, although it can be a bare copper wire, too. After that, lower the installation carefully and set it aside.
Now everything should be ready to install in the future. However, don’t leave the ceiling wires poking out from the interior of the junction case – place them back. If you’re not planning to install new lights, place the junction case cap as it were.

How to Disassemble It – Handle the Wire and the Grip
After lowering the object, you will see a bunch of wires and cables poking out. Bundle them and fix them with ties or rubber bands. This will make it easier to set up once you reach your new home. Take off all the light bulbs, candle cups, chains, arms, prisms, lampshades, and ornaments if there are any. If there are any crystal pieces, take them off and clean them before wrapping them separately.

What About Removable Pieces
All the detachable parts should be gently set aside or wrapped in appropriate packing materials. It can be useful to take photos of their placement to have a clear picture of how to reattach them after the move. In most cases, they are attached by wires, screws or hooks, so it could be a hassle to put them back as they were before.

Essential Steps of Packing for Moving Across the Country
After you’ve finished with the harder part, it’s time to wrap your installation and its accessories. In case you’ve prepared all the supplies, packing and unpacking can be fun. Make sure to get enough bubble wrap and padding materials to prevent potential damage.
Place the Chandelier In a Crate
Wrap everything in packing paper and bubble wrap. You can use several layers of bubble wrap to protect all parts thoroughly. After you’ve prepared the wooden crate, it’s time to hang the object properly.
Tie one end of the rope tightly around the carrying hook or chain and attach the other end of the string to the top of the crate. There should be around two inches of space between the bottom of the crate and the contents, so adjust the length of the rope accordingly. Now you can add additional padding. A garbage bag filled with packing peanuts might be the right solution. Use the peanuts to fill the crate to prevent the contents from swinging during the transport.
Pack It Into a Box
When it comes to packing the fixture in a cardboard box, the most crucial thing is to find one that is strong and big enough. The bottom should be reinforced to prevent unexpected splitting of the box.
After wrapping the light fixture in a large sheet of bubble wrap, you’ll understand why the box should be a few inches bigger than your valuable item. All space should be filled with foam cushioning or packing peanuts, and you can also consider placing several layers of blankets or towels on the bottom and the sides of the box.
Pack the Light Bulb and Accessories Safely
All the detachable pieces, such as chains, prisms, ornaments, and crystal parts, should be wrapped individually in packing paper or bubble wrap. Place them into a smaller package. Screws, hooks, and nuts should be stored in plastic zip-lock bags. Crystal pieces and light bulbs, being more delicate, need to be protected with bubble wrap and stored in a sturdy package.
Final Test
This last part of the packing process is crucial since it can tell you whether the items are packed correctly or you’ll have to use more padding materials. Shake the package gently, and if you feel or hear any movement, then additional protection must be added. When everything is tucked in nicely, close the boxes and seal them with packing tape. Write down labels such as “This Side Up” and “Fragile”.
Simplify Your Move with Professional Moving and Packing Services
If the thought of packing up your entire household, especially delicate items like chandeliers, feels overwhelming, you might want to consider hiring a long-distance moving company. Cross-country movers will offer professional long-distance moving services and exceptional packing assistance.
While there’s an additional cost involved, the peace of mind that comes with knowing your belongings are handled with care is invaluable. A reliable moving and auto transport company can prevent potential damage and ensure that your most valuable possessions arrive safely at your new home, allowing you to focus on settling in. That’s why you should give Flat Price Auto Transport and Moving a call, book your move, and relax.